How we cut our school bus in half
Removing the windows --- or not...
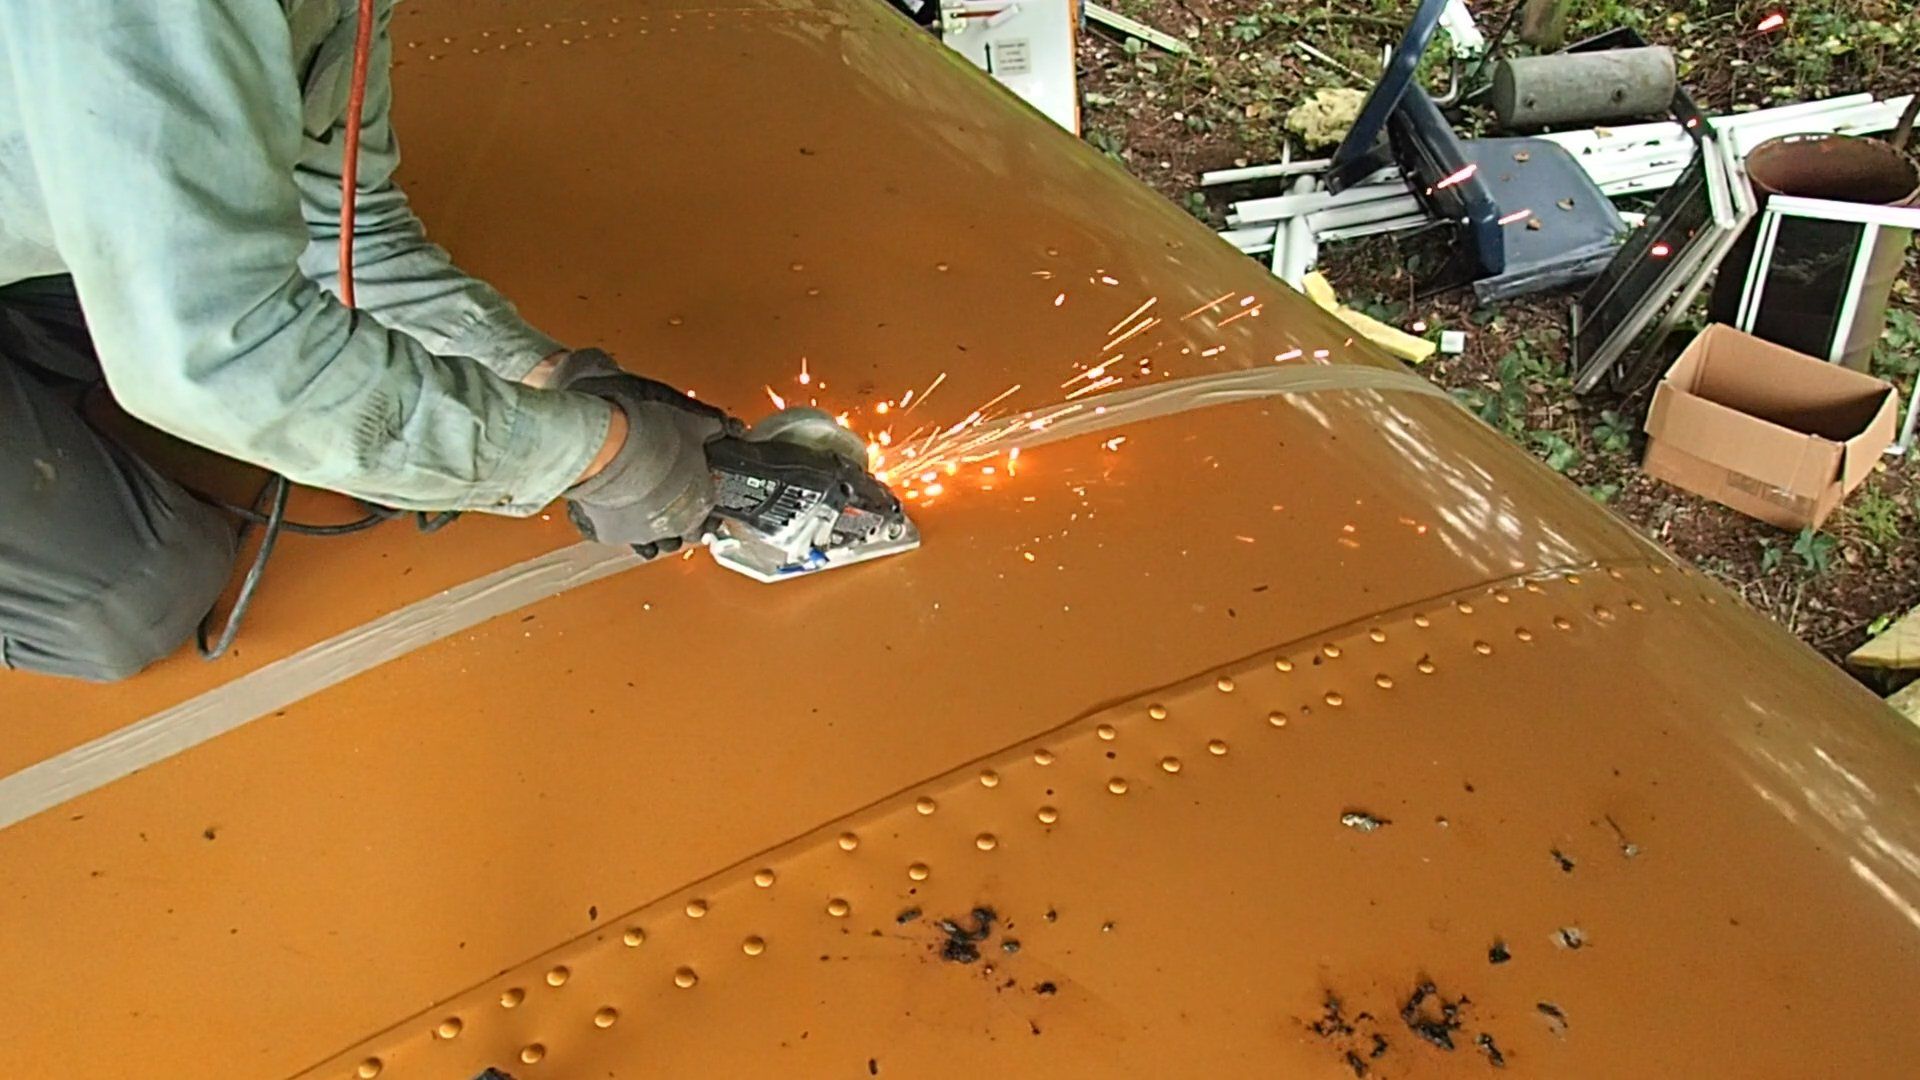
The first step was to remove all existing bus windows.
Most of them cooperated,
some not so much.
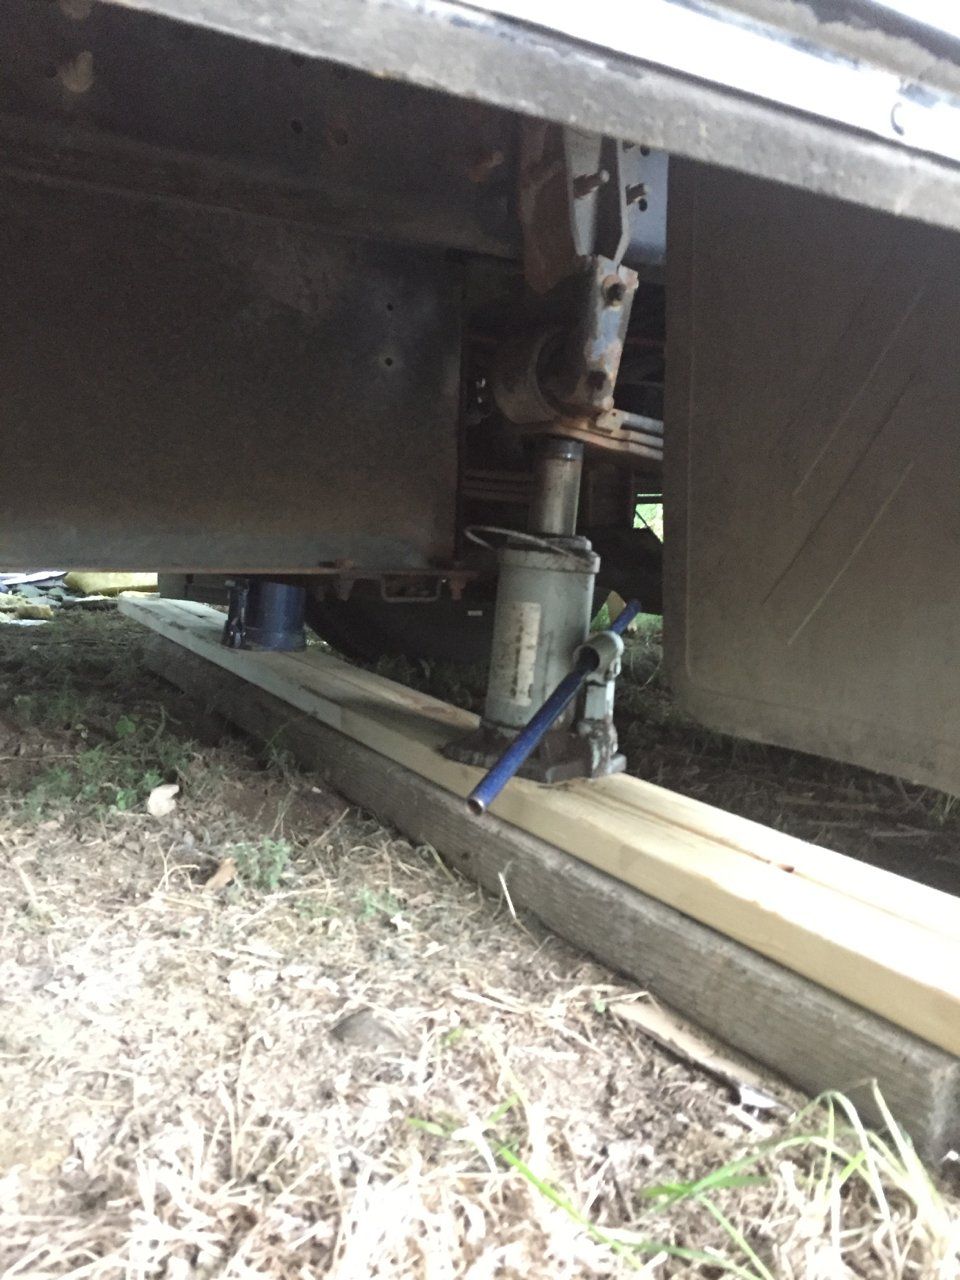
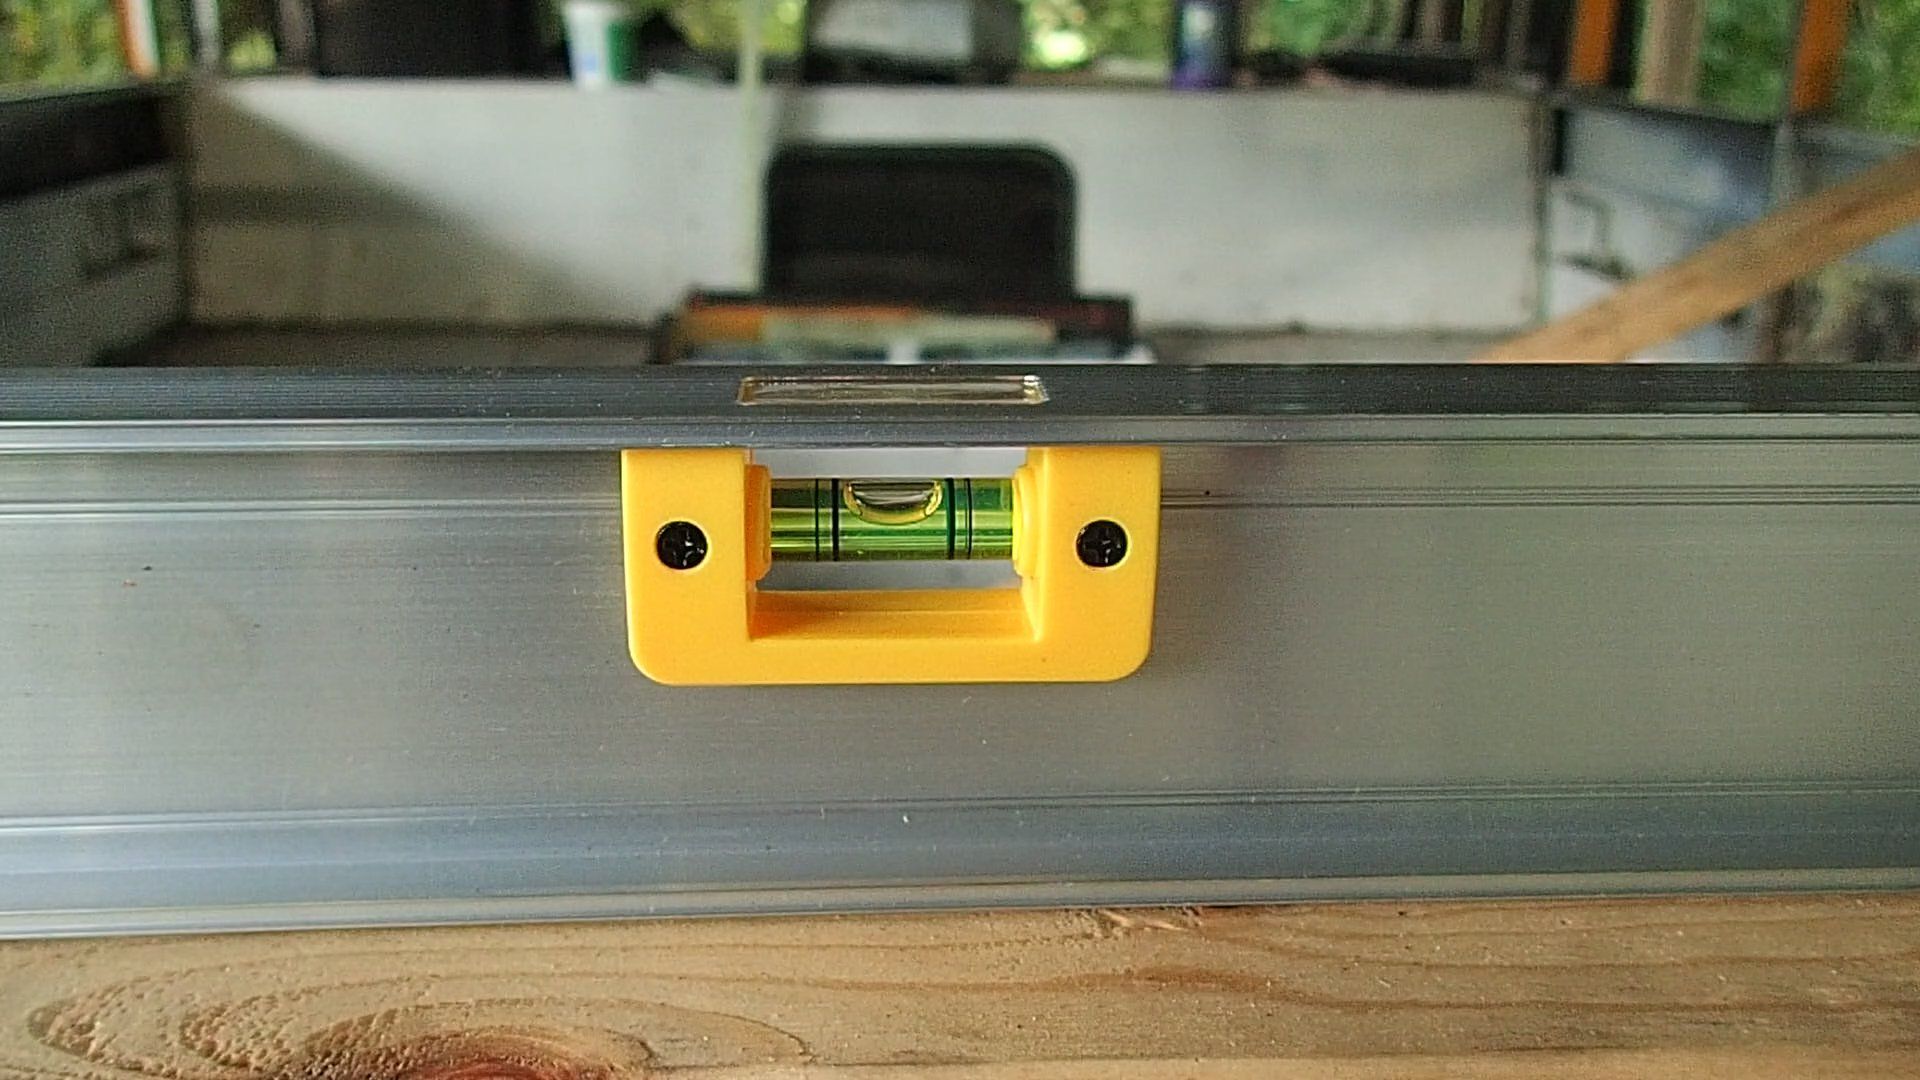
Next step was to stabilize
and level the bus
In order for the roof to not tilt or warp I first had to stabilize and level the entire bus since we do not have a leveled surface.
I used heavy duty jacks for stabilizing.
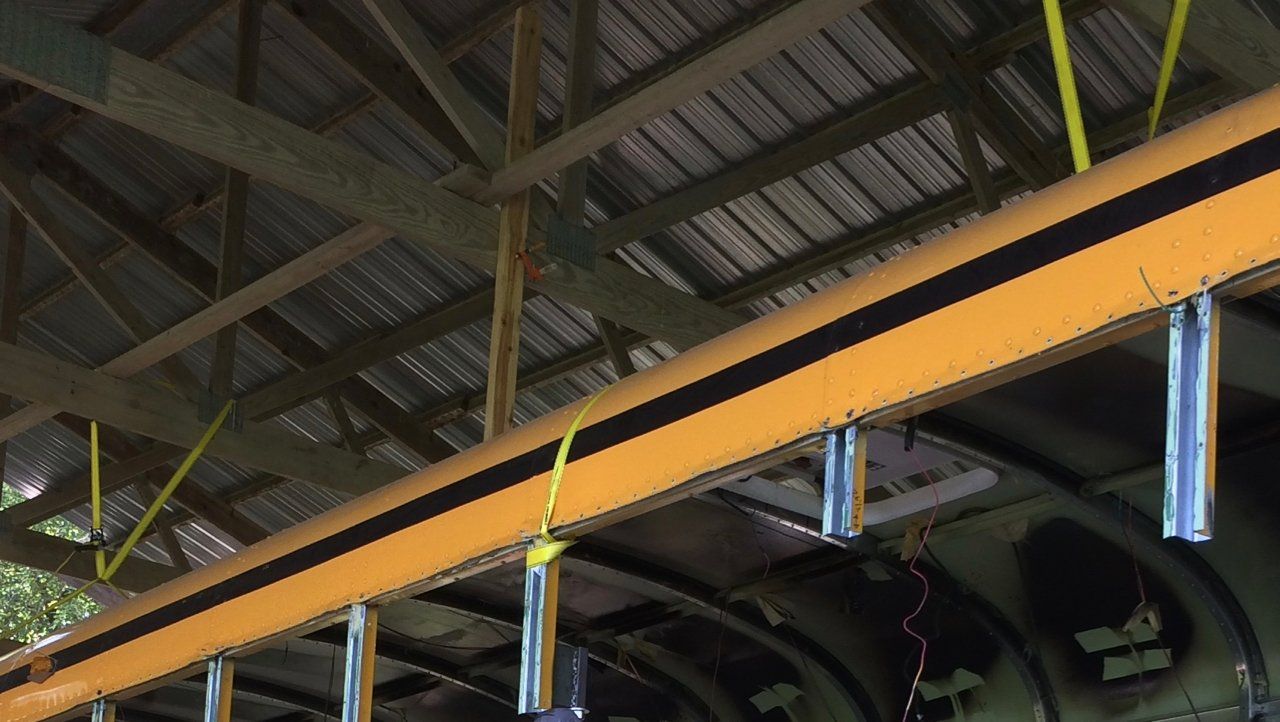
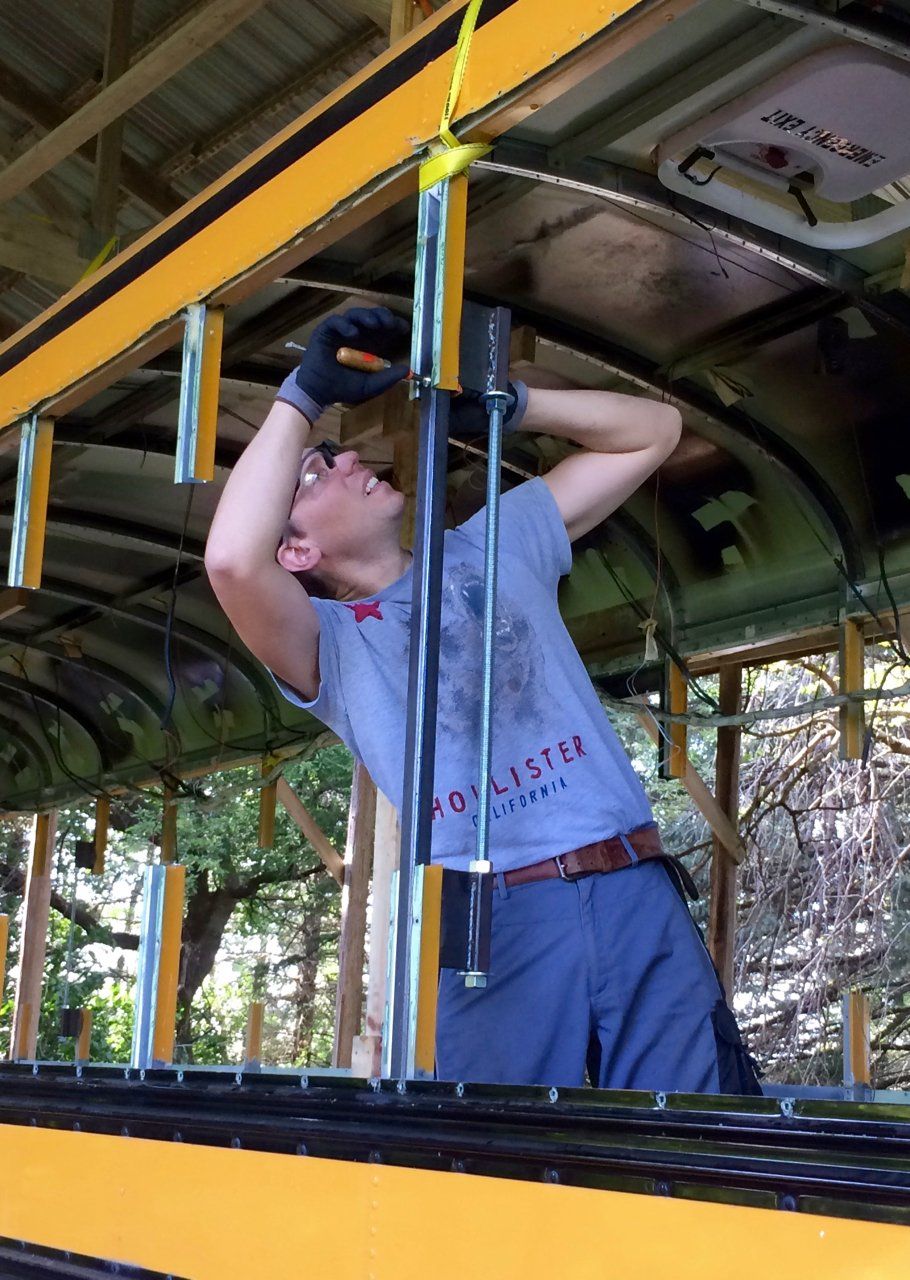
Securing the roof
I welded four custom fabricated brackets onto the columns. Two in the front and two in the back of the bus. Each bracket consists of two plates with a 1.25x 1.25 inch square tubing welded to it. With a threaded rod and nuts I was able to very accurately lift the roof.
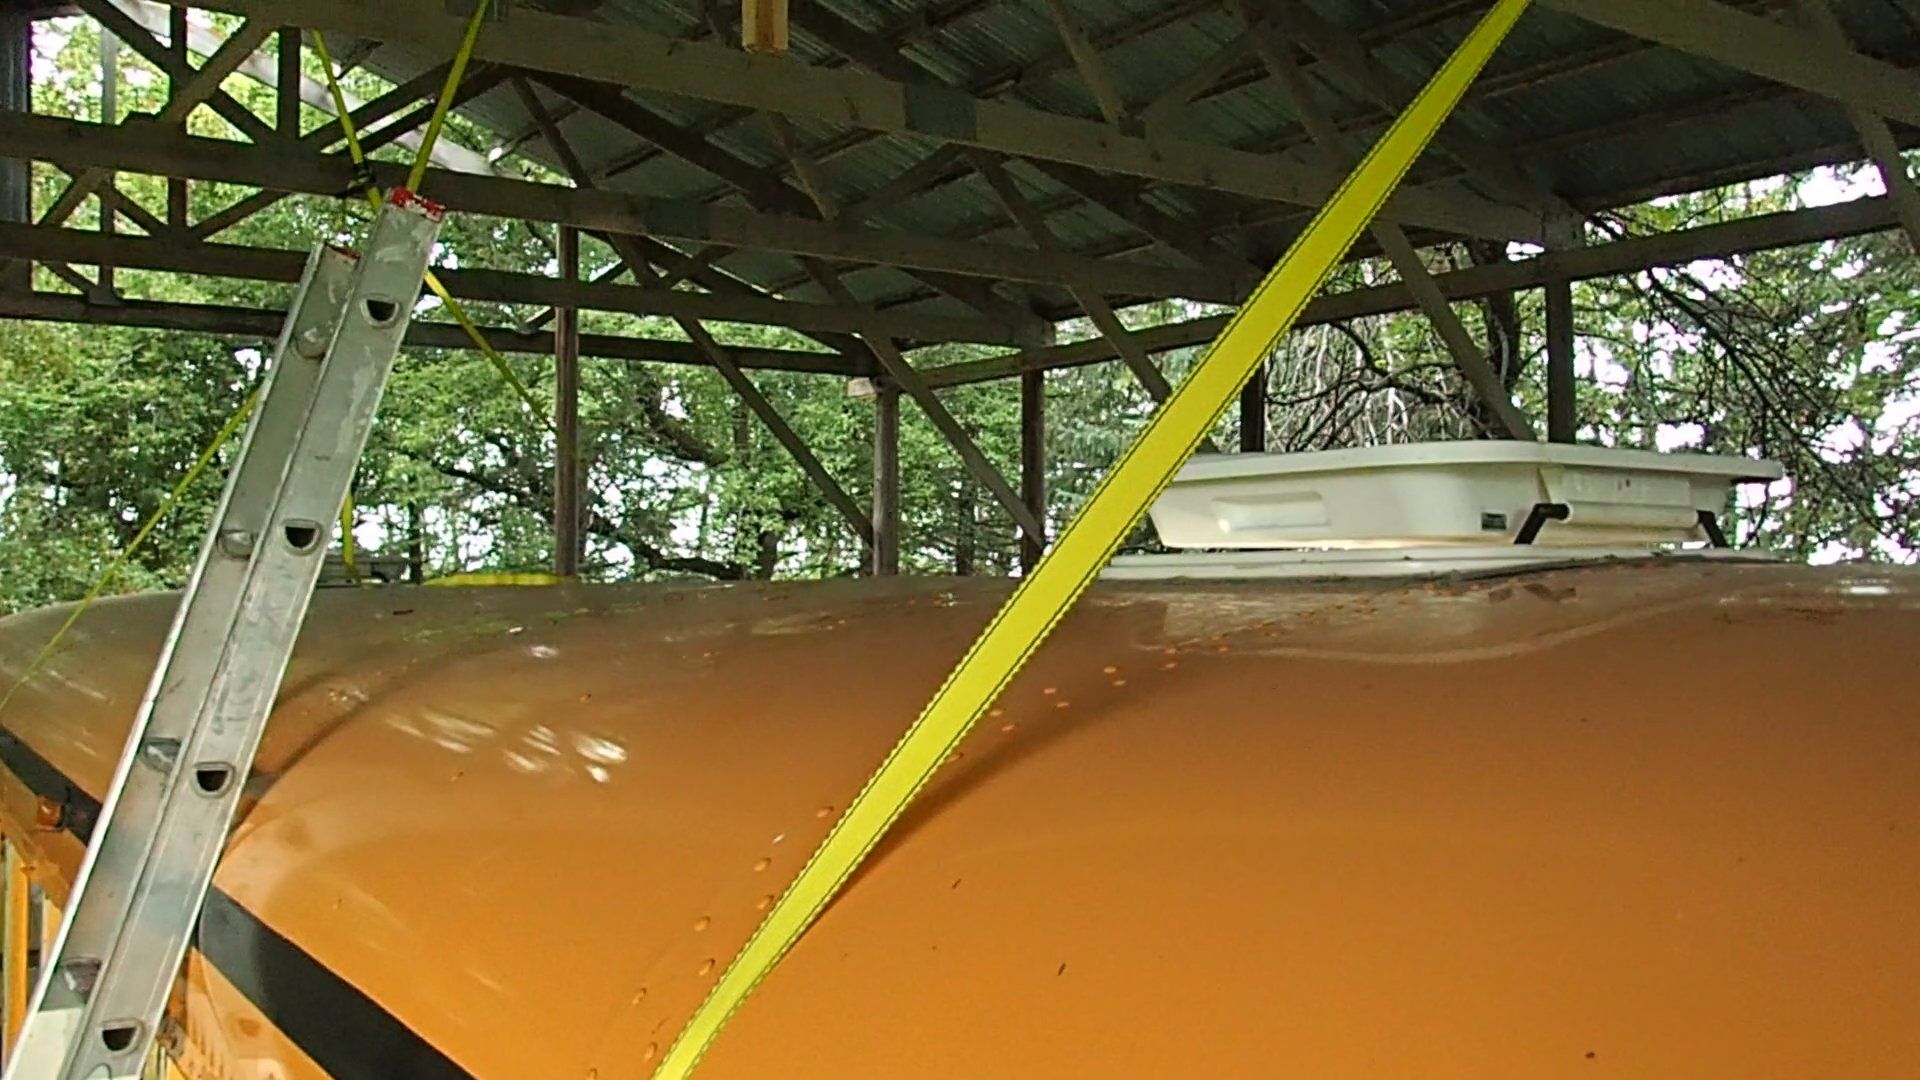
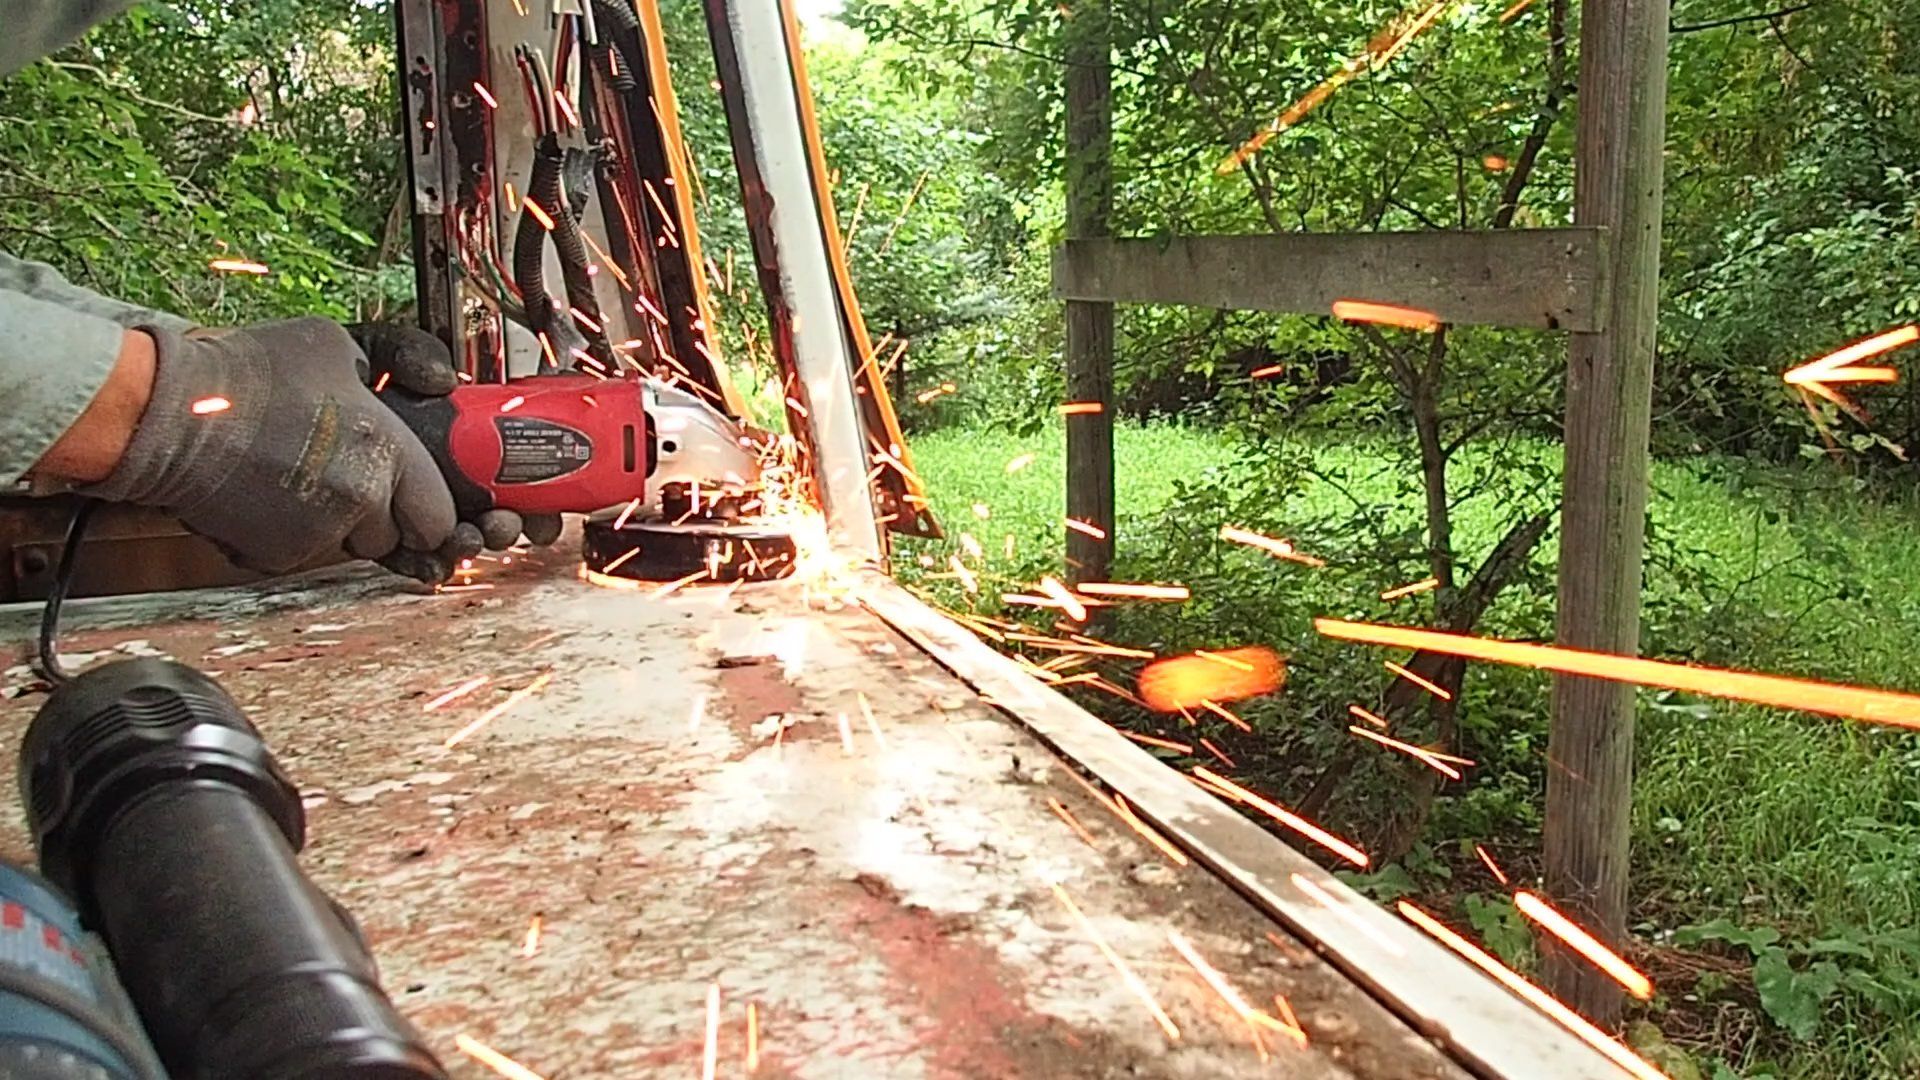
Cutting the roof off!
I have to admit it was a bit scary to cut the columns. Not the first few, but when it came to the last ones. I really double checked all safety measurements I took. Though the roof was surprisingly light. We raised the roof a total of 25 inches.

Due to the cold temperatures this winter we had to put the bus conversion on hold. We will continue when it warms up.
We have an Instagram account that we update almost daily. Feel free to follow us by clicking on the icon below.